
Just thought it would be useful to have a thread where people can post links to sites that have tutorials they have found to be useful, or tutorials they have created themselves. to start things off, here are my tutorials:
http://www.bronzepig.ca/tutorials/
right now there are only 2, but i have 3 in the works, creating custom brushes for Photoshop, Skin Tone and racial differences (so you don't draw a black person as a caucasian coloured dark. i HATE that.) and comic book colouring, which focusus on inked art (having covered pencil already) and making the drawing print ready.
and FARP is a collection of turotials on a wide variety of subjects. some are basic, come are advanced, you'll have to poke around a bit to find one good for you. Ursula Vernon's digital painting tutorial is highly reccomended. http://elfwood.lysator.liu.se/farp/?1547
Tutorials
Tutorials
Currently Reading:
Marvel: X-Factor, Uncanny X-Force
DC: Stormwatch, Action Comics, Batman, Swamp Thing, Animal Man, Frankenstein: Agent of S.H.A.D.E, Demon Knights, All-Star Western, Justice League Dark, Batgirl, Batwoman
Creator Owned/Other: American Vampire, Irredeemable, Incorruptible, Fables, The Boys, Sweet Tooth
Favorites that have ended: Y: The Last Man, Transmetropolitan, The Authority, Planetary, Sandman, Preacher
-
bluefooted
- Butt Monkey

- Posts: 301
- Joined: Thu Aug 14, 2003 5:22 pm
- Location: the OC
- Contact:
Tutorial: make a fake watercolor in Photoshop
This is a slightly older tutorial I made that basically combines a bunch of Photoshop tricks to get a single (somewhat useless) result. Not terribly exciting 
But, in case you're interested, here's a small tutorial on how I get a nice artificial watercolor-look in Photoshop 7. I'm sure that Painter actually has nice watercolor brushes that render all this extra work obsolete, but Photoshop users might find it interesting. It's pretty simple, too.
Step 1: Put your linework on a transparent background.
The way I've seperated linework from the background is, literally, 5 clicks of the mouse. Basically:
1. Click the 'channels' tab.
2. Click 'load channel as selection'.
3. Click 'delete' to get rid of the white.
4. Select 'inverse' to get your lines.
5. Hit ctrl C (to copy your selection) and ctrl V (to paste into a new layer).
6. You're done!
Takes me about 15 seconds to do, now. The advantages are now you only have a single layer to mess with and you can continue painting on it (changing the colors of your lines) during the whole process without messing up any of your other layers.
I'm not going to go into too much detail about how to do this - there's a nice tutorial here:
http://wacom.walkthroughs.nu/archives/2 ... .html#more
The reason I like to do this is it allows you to change your inkwork from black to... whatever color you like! Make sure you lock the transparency of the layer! Here's mine. I've got a white background behind it so you can see it. I've already changed some of the line colors:

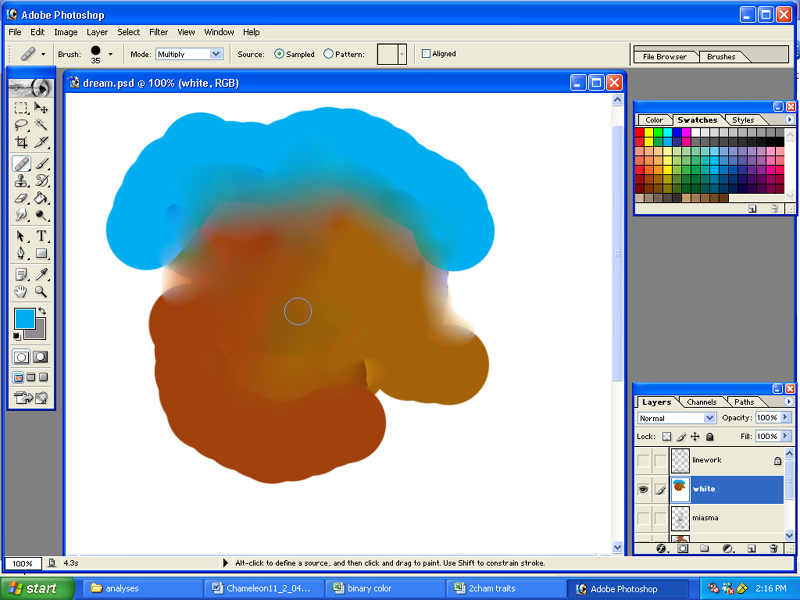
Step 2: Blend colors. So, to get the nice gradations in color that occur when you're using wet-on-wet watercolors, you can use the healing brush, the little 'band-aid' on your tool pallette. The way I do this is pick a portion of the painting and block in all of the basic colors. Then go back and blend the edges with the healing tool set on 'multiply' (on your tool settings). Here's some random scribbling so you can see what it might look like:
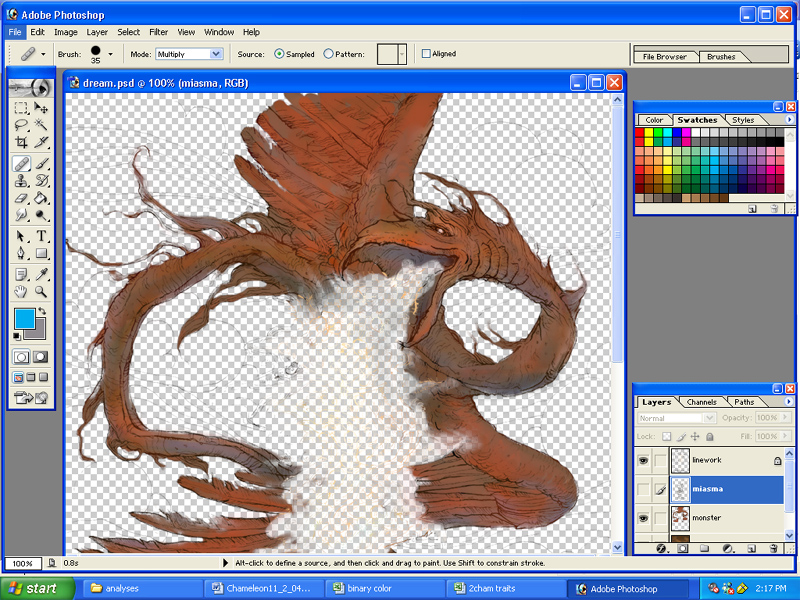
I like to work on each 'element' separately, that way I can't screw up the whole thing at once. It's best to just go crazy with color, then use the healing tool, then clean up around your lines with the eraser. Here's the monster, cleaned-up:
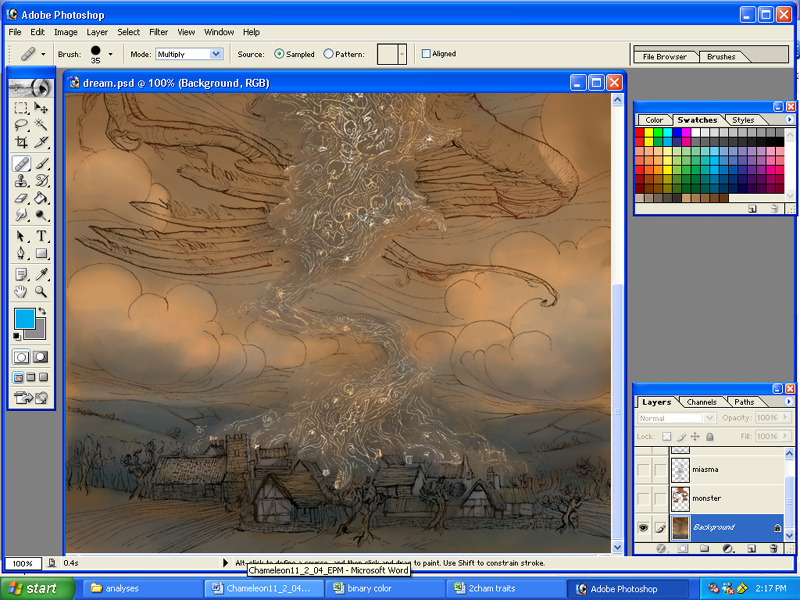
and the background - all done the same way. It gets a little boring after awhile
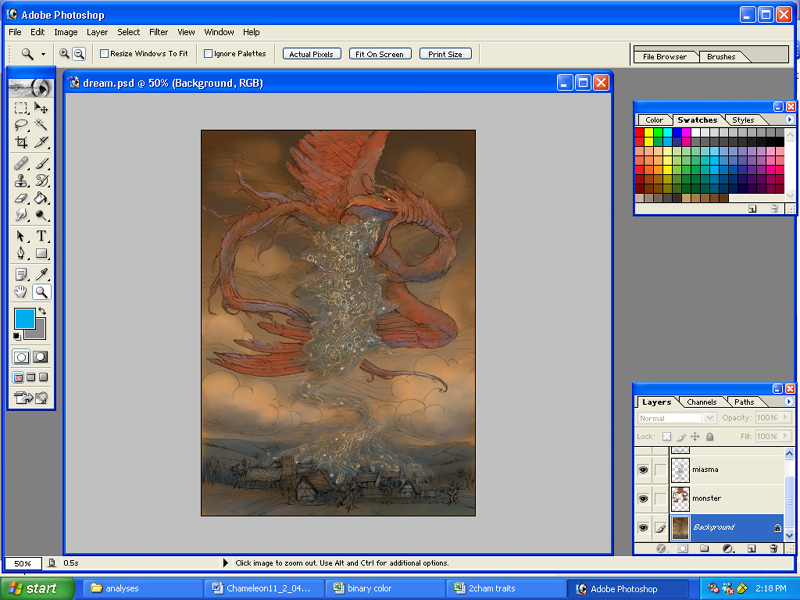
Step 3: Time to add texture! So, once you've got your finished image all sorted out - colors adjusted, etc. - you're ready to add some texture. Save your finished pic as a jpg (or flatten the image in PS). Here's my finished pic:
So, grab your texture jpg - this can be an interesting piece of paper that you scanned, or just about anything. Mine came from this really nice person, who put his collection online:
http://www.eatpoo.com/phpBB2/viewtopic.php?t=35809
Here it is 'in action':

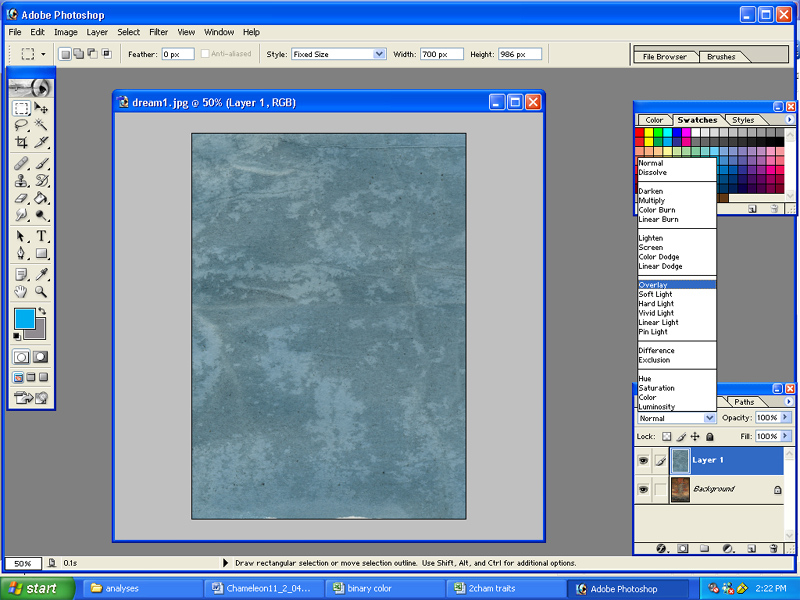
Cut out a piece of the texture that matches the size of your picture and paste it into a new layer on top of your pic. It should cover it up. Set your texture layer style to 'overlay':
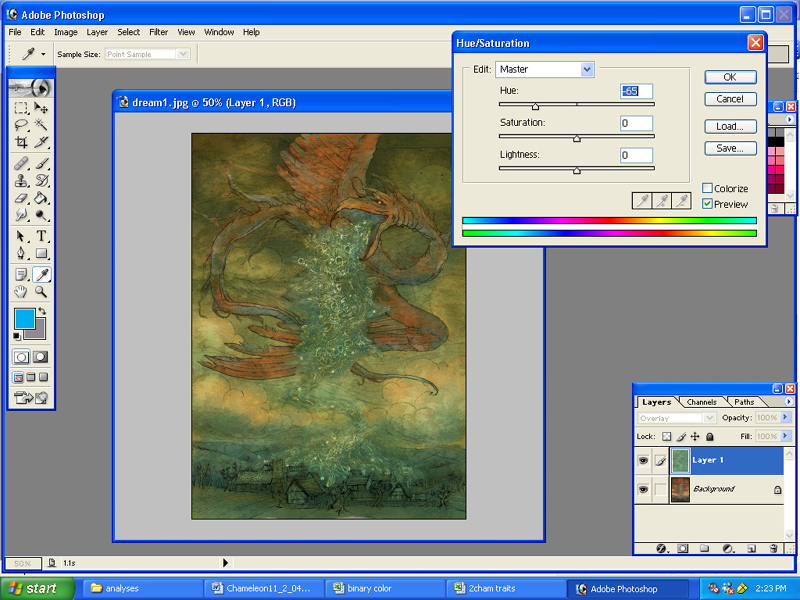
Step 4: Adjust your texture! Now you can change aspects of the texture layer, like hue, saturation, and opacity. Also, you may want to make some adjustments to your pic now that it's got this overlay - I've upped the contrast and made some color changes. Having the picture as a single layer really makes this process a lot easier.
And viola! Let me know if this was at all helpful!

But, in case you're interested, here's a small tutorial on how I get a nice artificial watercolor-look in Photoshop 7. I'm sure that Painter actually has nice watercolor brushes that render all this extra work obsolete, but Photoshop users might find it interesting. It's pretty simple, too.
Step 1: Put your linework on a transparent background.
The way I've seperated linework from the background is, literally, 5 clicks of the mouse. Basically:
1. Click the 'channels' tab.
2. Click 'load channel as selection'.
3. Click 'delete' to get rid of the white.
4. Select 'inverse' to get your lines.
5. Hit ctrl C (to copy your selection) and ctrl V (to paste into a new layer).
6. You're done!
Takes me about 15 seconds to do, now. The advantages are now you only have a single layer to mess with and you can continue painting on it (changing the colors of your lines) during the whole process without messing up any of your other layers.
I'm not going to go into too much detail about how to do this - there's a nice tutorial here:
http://wacom.walkthroughs.nu/archives/2 ... .html#more
The reason I like to do this is it allows you to change your inkwork from black to... whatever color you like! Make sure you lock the transparency of the layer! Here's mine. I've got a white background behind it so you can see it. I've already changed some of the line colors:
Step 2: Blend colors. So, to get the nice gradations in color that occur when you're using wet-on-wet watercolors, you can use the healing brush, the little 'band-aid' on your tool pallette. The way I do this is pick a portion of the painting and block in all of the basic colors. Then go back and blend the edges with the healing tool set on 'multiply' (on your tool settings). Here's some random scribbling so you can see what it might look like:
I like to work on each 'element' separately, that way I can't screw up the whole thing at once. It's best to just go crazy with color, then use the healing tool, then clean up around your lines with the eraser. Here's the monster, cleaned-up:
and the background - all done the same way. It gets a little boring after awhile
Step 3: Time to add texture! So, once you've got your finished image all sorted out - colors adjusted, etc. - you're ready to add some texture. Save your finished pic as a jpg (or flatten the image in PS). Here's my finished pic:
So, grab your texture jpg - this can be an interesting piece of paper that you scanned, or just about anything. Mine came from this really nice person, who put his collection online:
http://www.eatpoo.com/phpBB2/viewtopic.php?t=35809
Here it is 'in action':
Cut out a piece of the texture that matches the size of your picture and paste it into a new layer on top of your pic. It should cover it up. Set your texture layer style to 'overlay':
Step 4: Adjust your texture! Now you can change aspects of the texture layer, like hue, saturation, and opacity. Also, you may want to make some adjustments to your pic now that it's got this overlay - I've upped the contrast and made some color changes. Having the picture as a single layer really makes this process a lot easier.
And viola! Let me know if this was at all helpful!
Tutorials
that's very cool.... I really need to learn to use textures like that more often. I saw one girl on DevART do a tutorial that used textures in a similar way. really must play with that....
Currently Reading:
Marvel: X-Factor, Uncanny X-Force
DC: Stormwatch, Action Comics, Batman, Swamp Thing, Animal Man, Frankenstein: Agent of S.H.A.D.E, Demon Knights, All-Star Western, Justice League Dark, Batgirl, Batwoman
Creator Owned/Other: American Vampire, Irredeemable, Incorruptible, Fables, The Boys, Sweet Tooth
Favorites that have ended: Y: The Last Man, Transmetropolitan, The Authority, Planetary, Sandman, Preacher